Table of contents
Growing your own vegetables at home has endless benefits, both for you and the planet. The shorter the distance your food has to travel to the table, the better for the environment.
You know where your food is coming from, don’t need fertilizer or pesticides, and won’t waste energy in transportation. Plus, there’s no question that homegrown veggies taste better!
Of course, not everyone has the luxury of a large backyard with space for a garden. Luckily, that doesn’t mean you can’t grow your own vegetables at home - outdoors or indoors!
Instead of growing out, grow up with a vertical vegetable garden that supports growing all your favorite veggies in a small space.

Why Choose a Vertical Vegetable Garden Vs. a Traditional Garden
Whether you have an apartment balcony, porch, or patio, your vertical garden can greatly change the way you eat and feel about your food, plus it will look beautiful at the same time. Here are the top reasons to use a vertical garden rather than a traditional one:
- It takes up less space
- It can be indoor or outdoor
- It’s aesthetically pleasing
- It provides great airflow for vegetables and helps them get adequate sunlight
- It keeps plants safe from pests
- It keeps climbing vegetables like tomatoes from growing mold
- It’s convenient and portable
- You don’t have to bend over to plant or maintain, which makes vertical gardening a great hobby for seniors.
Steps To Building A Vertical Vegetable Garden
Once you’ve decided that a vertical garden is the best choice for you, it’s time to bring your garden to life. Follow these steps for stress-free vertical gardening.
Step 1: Choose Your System
Shelves
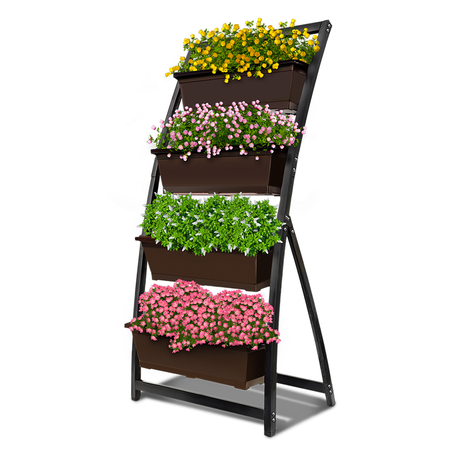
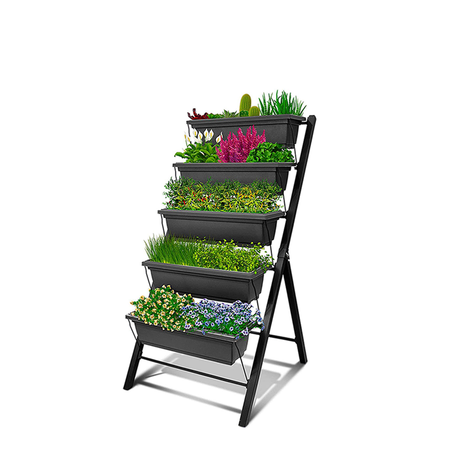
Vertical vegetable gardens with bins on shelves, like an Outland Vertical Garden are easy-to-use for newcomers to vertical gardening. You can choose a large or small system, which comes with bins on each row. Outland bins are made to be food-safe so they won’t leak plastics into the soil. Plus, they are attractive and come in three colors!
Terrace Vertical Garden
Trellis
Trellises are primarily used for growing tomatoes and other climbing vine vegetables like peas and pole beans, but they can be used for melons and cucumbers as well. A trellis or cage lifts the vegetables off the ground so that they stay clean and get plenty of sunlight. Your climbers will sprout tendrils to support themselves by attaching to the trellis, something they wouldn't be able to do with any other type of garden system. While hanging planters can be used for lightweight cherry tomatoes, you will want to plant heavier climbing vegetables on a trellis.
Other Vertical Vegetable Garden Ideas
There is no end to the amount of vertical vegetable gardening ideas out there, so be creative and see which type of system works best for your needs. Here are some other popular methods of vertical gardening.
- Garden Tower with Pockets
- Hanging Baskets
- Pallet Garden
- Mason Jar Herb Garden
- Gutter Garden Made of PVC Pipes

Step 2: Choose Where to Set Up Your Vertical Garden
The beauty of a vertical garden is that it can go almost anywhere as long as there is natural sunlight and enough square feet to accommodate the system. Common places for vertical gardens include a balcony or patio, but you can also set yours up inside. If you desire to grow herbs, place your garden in your kitchen by a window so that you have easy access when you are cooking.
Make sure the pots or bins at the top of your vertical garden don't cause too much shade over the plants below.
Greenwood Vertical Garden
Step 3: Choose the Best Vegetables for Vertical Gardening
Now comes the fun part! What are your favorite vegetables (you can grow herbs, fruit and succulents, too) that you would like to plant in your vertical garden? Keep in mind that some of these should be planted in the spring and some should be planted in the fall. Their seed packets will specify when to plant them. Below, we've rounded up some of the best vegetables for vertical gardening:
- Leafy greens
- Tomatoes
- Cucumbers
- Squash
- Peas
- Green Beans
- Radishes
- Fennel
- Zucchini
- Pumpkins
- Peppers
- Potatoes
- Carrots
- Snow peas
- Eggplant
Step 4: Get Your Soil Ready
Before you start planting, prepare your soil to set your veggies up for success. This process will depend on what type of vertical garden you are using, but in general, we recommend using organic topsoil that can be found at your local garden center.
Your soil should be light and fluffy, not too sandy or filled with clay. Ultimately, the soil should replicate the healthy ground to create a thriving ecosystem for your vegetables.

If you are working with bins, it’s important that they have some sort of drainage system, though this doesn't necessarily mean you need drainage holes. Instead, try adding several inches of gravel or rocks to the bottom of the bin. This will allow proper drainage for your vertical garden vegetables. Next, we recommend mixing your organic topsoil with compost in a ratio of 80 percent soil to 20 percent compost. Layer this on top of the gravel up to two inches from the top of the bin. Finally, you can add organic fertilizer to the top before planting.
Step 5: Plant
Grab your gardening gloves; it’s time to plant! The amount of space and depth for your seeds will differ based on which vegetables you are planting, so be sure to read their seed packets for instructions. Once you have planted your seeds, give them their first water in a light rain-like stream or spray.
To keep track of your veggies, we recommend using Outland Plant Labels, which can be reused. Even if you are building a traditional garden or a DIY vertical garden, these labels are easy to spot among your crops.
Fernie Vertical Garden
Step 6: Maintenance for Growing Vegetables Vertically
Within about two months, you should be able to see your quick maturing veggies starting to grow! It’s important to practice good vertical garden care to keep them thriving so that you can continue to enjoy them. You’ll find that the bin systems are mess-free and very easy to clean.
Watering: You should water your veggies once or twice a week; the best time is in the mornings before sunrise so that they have time to dry during the day. If it rains, then you won’t need to water as often.
Pruning: When you notice dead leaves or vegetables, go ahead and prune them to avoid disease and bacteria. Sterilize your pruning shears after trimming decayed matter to avoid spreading bacteria to other plants. If weeds start to grow, remove them right away!
Harvesting: As soon as your veggies reach maturity, it’s time to harvest them. The more you harvest, the more will grow back. For lettuce and other leafy veggies, cut them two inches from the soil.
Winterizing: Many people dump out their vertical gardens in the winter and store them inside until warmer weather returns in the spring for new planting. If you are growing perennial plants, you can of course bring the vertical garden inside for the winter. That’s a great benefit of having it be a portable structure! If this is the case, you will eventually want to turn over your soil after a few years.


